 ultimate-guide
How to Prevent Concrete Driveway Cracking
Table of Contents
- Understanding Why Concrete Driveways Crack
- The Proper Concrete Curing Process
- Installing Concrete Control Joints Spacing Correctly
- Preparing the Subgrade and Base Layer
- When to Apply Concrete Sealer
- Managing Water Content and Drainage
- Climate-Specific Prevention Strategies
- DIY vs. Professional Installation Checklist
- Frequently Asked Questions
Last Updated: September 21, 2026
Understanding Why Concrete Driveways Crack
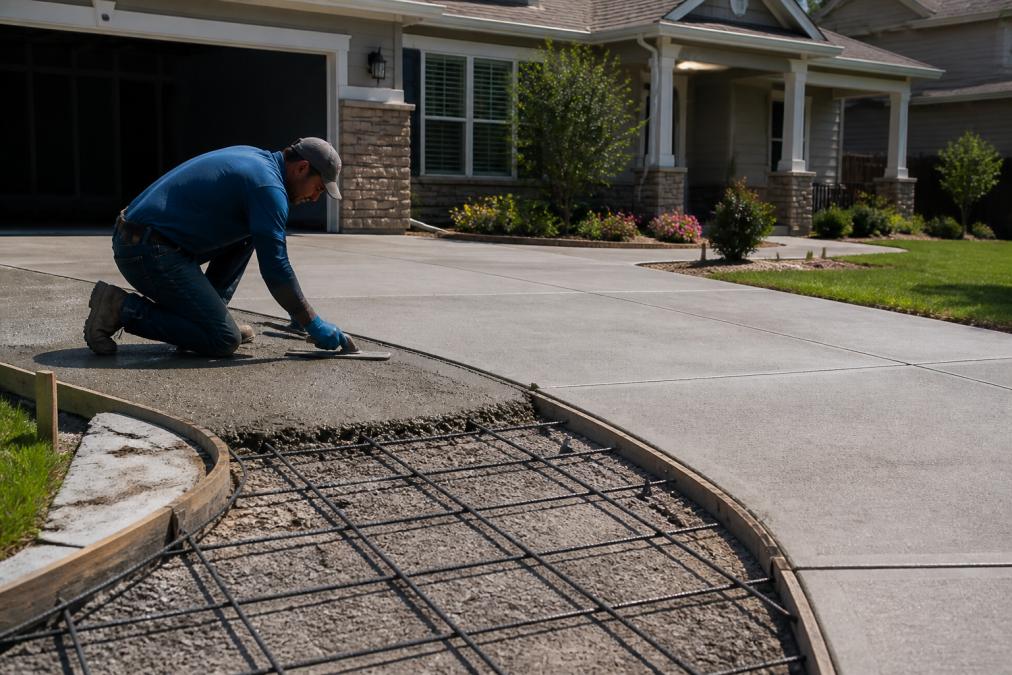
Learning how to prevent concrete driveway cracking starts with understanding that most cracks result from preventable mistakes: poor subgrade preparation, inadequate curing, or freeze-thaw exposure without sealing.
Concrete shrinks during hydration. Without proper joint placement and curing, stress releases as cracks. Water penetration, temperature swings, and base settlement accelerate failure.
How to prevent concrete driveway cracking starts with understanding root causes. Most are manageable with planning; by the time cracks appear, repairs cost more than prevention.
Hairline edge cracks signal improper curing or excess water. Larger structural cracks indicate subgrade issues. Settlement cracks radiating from a point reveal unstable soil.
The Proper Concrete Curing Process
Most DIY installations fail at curing. Concrete hardens on the surface in 24-48 hours but gains strength for weeks. Improper curing during this window causes premature cracking.
Curing Timeline and Methods
Concrete reaches 70% strength in seven days and full strength in 21-28 days. Rushing this process or applying stress prematurely creates internal stress and cracks.
Wet curing keeps the surface moist using water, blankets, or plastic sheeting to slow evaporation. Curing compounds trap moisture chemically. Curing blankets provide insulation and retention. Plastic sheeting is basic but requires careful installation.
Professionals recommend wet curing for the first week, then controlled drying. Curing blankets provide consistent moisture retention without daily water application.
Temperature and Moisture Control
Concrete should cure between 50°F and 85°F. Below 50°F, hydration slows. Above 85°F, the surface dries too quickly while the interior remains wet, causing surface cracks and crazing.
If the surface dries while the interior cures, moisture migration causes plastic shrinkage cracks within days. Keeping the surface wet prevents this; balance moisture to avoid standing water.
In freeze-thaw climates, never pour concrete if freezing is expected within 48 hours. Ice formation causes surface scaling and internal damage that worsens over years.
Installing Concrete Control Joints Spacing Correctly
Control joints are intentional cuts or grooves in concrete that guide where cracks will form. Without them, concrete cracks randomly and unpredictably. With them, cracks form at planned locations where they're easier to maintain and less visible.
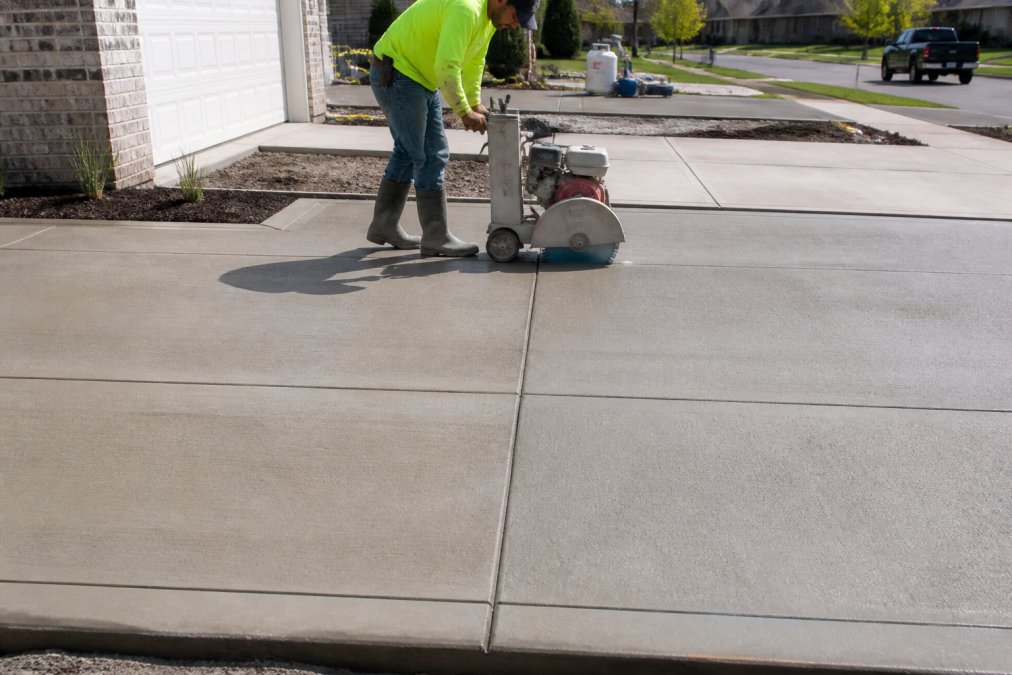
Install control joints at intervals equal to slab thickness in feet, multiplied by 2-3. For 4-inch driveways, space joints every 8-12 feet; for 6-inch slabs, 12-18 feet apart.
Joints should run perpendicular to traffic and extend one-quarter to one-third of slab depth. Cut to 1-1.5 inches on a 4-inch slab, shallow joints don't guide cracks; too-deep joints weaken the slab.
Cut joints 12-24 hours after pouring, early enough to prevent random cracks, late enough to avoid spalling.
Preparing the Subgrade and Base Layer
The subgrade determines driveway performance. Poor preparation causes more failures than any other factor, yet homeowners often treat it as an afterthought.
Understanding Soil Composition and Movement
Not all soils behave the same way. Soil type directly influences how much your driveway will move, and movement is the root cause of most structural cracks.
Clay-heavy soils expand when wet and shrink when dry, up to 5-10% of volume. This cyclical movement stresses the slab, causing large structural cracks that radiate outward and widen seasonally.
Sandy or well-draining soils are ideal. They don't expand or contract significantly with moisture changes, providing a stable foundation.
Drainage: The Hidden Cracking Culprit
Water trapped in the subgrade causes soil expansion (differential heave and cracks), subgrade weakening (uneven settlement), and freeze-thaw damage (heaving and voids).
Subgrade Compaction and Base Layer Preparation
Subgrade compaction is non-negotiable. Loose soil settles, creating voids and differential settlement, a primary cause of structural cracks. Achieve 95% density with mechanical equipment; hand tamping leads to cracking within 1-2 years.
Identifying Problem Soils Before You Pour
Red flags requiring professional assessment: visible clay, poor drainage, existing settlement in nearby structures, slope toward the structure, or basement moisture history. Engineered solutions upfront cost far less than repairs.
When to Apply Concrete Sealer
Concrete sealer protects against moisture penetration, UV damage, and chemical attack, all of which accelerate cracking. The question isn't whether to seal, but when and how often.
Managing Water Content and Drainage
The water-cement ratio is critical for durability. Too much water weakens concrete and increases cracking; too little prevents hydration.
Climate-Specific Prevention Strategies
In freeze-thaw climates, seal concrete, ensure drainage, and use air-entrained concrete (with tiny air bubbles) to provide space for ice expansion.
DIY vs. Professional Installation Checklist
Before deciding whether to tackle concrete work yourself, evaluate these factors honestly. This isn't just about capability, it's about understanding the true cost of failure.
The Real Cost of DIY Failure
Failed DIY driveways develop cracks within 6-12 months if subgrade compaction is inadequate. Repair and replacement costs often exceed professional installation.
DIY Feasibility Decision Tree
Project Size: Under 200 sq ft is DIY-feasible. 200-400 sq ft is labor-intensive. Over 400 sq ft requires professional installation.
Site Conditions:
- Flat terrain, good drainage, stable soil: DIY-friendly.
- Sloped terrain, clay soil, or poor drainage: Professional assessment required. Subgrade prep becomes complex and mistakes are costly.
- Existing cracks or settling nearby: Hire a professional. The site likely has structural issues that require diagnosis.
Soil Type (Assess Before Committing):
- Sandy or well-draining soil: DIY risk is lower.
- Silt-based soil: Manageable with proper drainage planning.
- Clay-heavy soil: Strongly recommend professional installation. Clay requires engineered drainage solutions that DIY installers often underestimate.
Equipment Access and Rental Cost:
- Mechanical compactor (vibratory plate): $40-$80/day rental
- Concrete mixer or pump truck: $100-$300/day rental
- Concrete saw (for control joints): $50-$100/day rental
- Total equipment rental: $200-$500 for a multi-day project
Critical Skills Required for DIY (Honestly Assess Each):
- Proper grading and slope calculation, Can you establish and maintain a 1-2% slope consistently across the entire driveway? Mistakes here cause drainage failure and cracking.
- Subgrade and base layer compaction, Do you have access to mechanical compaction equipment and the experience to achieve 95% density? This is where most DIY projects fail. Hand tamping is insufficient.
- Formwork setup and leveling, Can you build and level forms to within 1/8 inch across the entire slab? Unlevel forms cause uneven concrete thickness and weak spots.
- Concrete mixing and pouring technique, Do you understand water-cement ratios and how to pour and spread concrete without trapping air pockets?
- Finishing (troweling, edging), Can you trowel concrete smoothly without creating surface defects that accelerate cracking?
- Joint placement and cutting timing, Do you know where to place control joints and when to cut them (12-24 hours after pouring)? Timing is critical.
- Curing protocol adherence, Can you commit to wet-curing for 7-14 days without interruption? This requires daily attention and discipline.
When Professional Installation Is Essential
Do not attempt DIY concrete if:
- Your soil is clay-heavy or has poor drainage (requires engineered solutions).
- The driveway is over 400 square feet.
- The site is sloped or has existing drainage issues.
- You lack access to mechanical compaction equipment.
- You cannot commit 3-4 weeks of active work plus 28 days of curing management.
- You have no prior concrete experience.
In these scenarios, the cost difference between a failed DIY project and professional installation is often negligible or favors the professional. A one-year workmanship warranty from a reputable contractor also provides peace of mind that DIY cannot offer.
Professional Installation Advantages
- Equipment access: Mechanical compaction, concrete saws, curing equipment, and possibly pump trucks for large pours.
- Experience with local soil and climate conditions: Professionals understand regional soil types, drainage challenges, and freeze-thaw risks. They adjust their approach accordingly.
- Proper sequencing and timing: Subgrade prep → base layer → formwork → pouring → curing → sealing. Professionals manage each phase with precision.
- Warranty coverage: Reputable contractors typically guarantee work for 1+ years, covering material and labor defects.
- Code compliance and permits: Professionals ensure the work meets local building codes and obtain necessary permits.
- Speed and efficiency: Professional crews complete projects in days, not weeks, minimizing weather exposure and allowing faster driveway use.
Frequently Asked Questions
Is it common for concrete driveways to crack?
Yes, some cracking is normal in concrete driveways. Hairline cracks often develop due to shrinkage during the curing process or minor settlement. However, large structural cracks or widespread cracking patterns indicate installation or maintenance issues. Proper concrete curing, control joint placement, and drainage management significantly reduce the likelihood of problematic cracks forming.
What is the best way to prevent shrinkage cracks in concrete?
Shrinkage cracks occur when concrete loses moisture too quickly during curing. Prevent them by maintaining proper water-cement ratio during mixing, using curing blankets or compounds to slow evaporation, keeping the surface moist for 7-14 days, and controlling temperature fluctuations. Installing control joints at regular intervals also allows shrinkage to occur predictably along these designed weak points rather than randomly across the slab.
When should I apply concrete sealer to my driveway?
Apply concrete sealer after the concrete has fully cured, typically 28 days after pouring. Wait until the surface is completely dry and any existing cracks have been repaired. Reapply sealer every 2-3 years, or as recommended by the product manufacturer, to maintain protection against moisture penetration, UV damage, and freeze-thaw cycles that can cause cracking and deterioration.
How does soil composition affect concrete driveway cracking?
Poor soil composition and inadequate drainage create uneven settling and moisture accumulation beneath the concrete, leading to settlement cracks and structural damage. Clay-heavy soils retain water and shift with freeze-thaw cycles. Proper subgrade preparation includes compacting the base layer, adding a drainage slope, and improving soil stability to prevent movement that causes cracking.